Setting Up an Online Class in WISE for Institute
Step 1: Verify Student Information
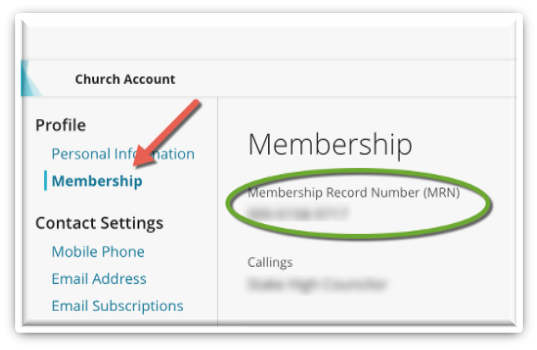
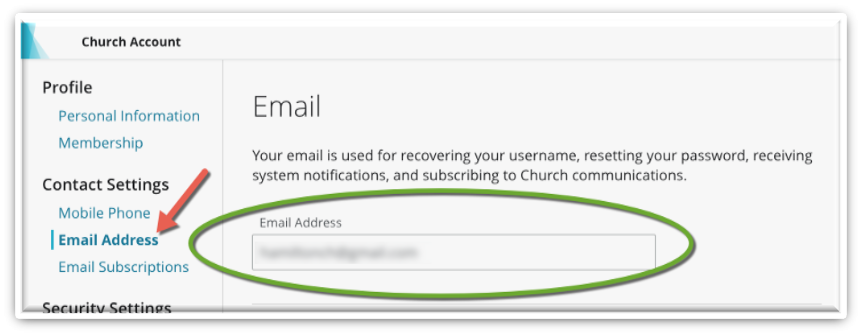
In order for students to be enrolled in a class in Canvas and to access the system, we must have their Church Account ID and their email address (which must be connected to their membership record number [MRN]). Only students are allowed to take this step. Do not collect this information manually.
a) Ensure that all students have logged in to account.ChurchofJesusChrist.org and have verified that their MRN and current email address are showing in the system.
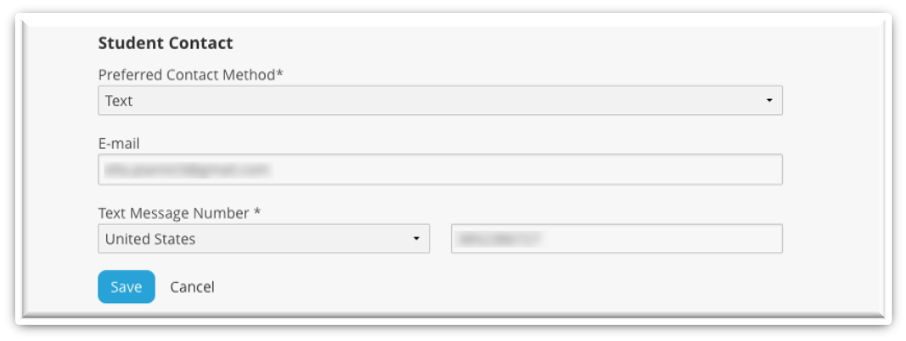
b) Ensure that all students have logged in to myInstitute.ChurchofJesusChrist.org and have entered or verified their email address, text number, and text country.
Step 2: Create the Online Class
You will be creating a single online class for all of the students in your program. Each teacher will have access to this class and be able to engage with and monitor the students from there.
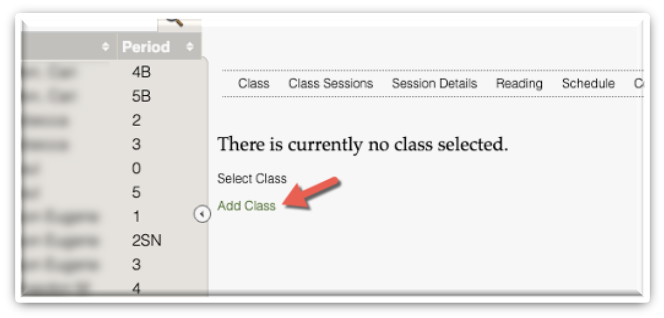
a) In WISE1, click the Classes tab and click Add Class.
Step 3: Enter Class Information
a) Select Online / COVID in the Class Type field.
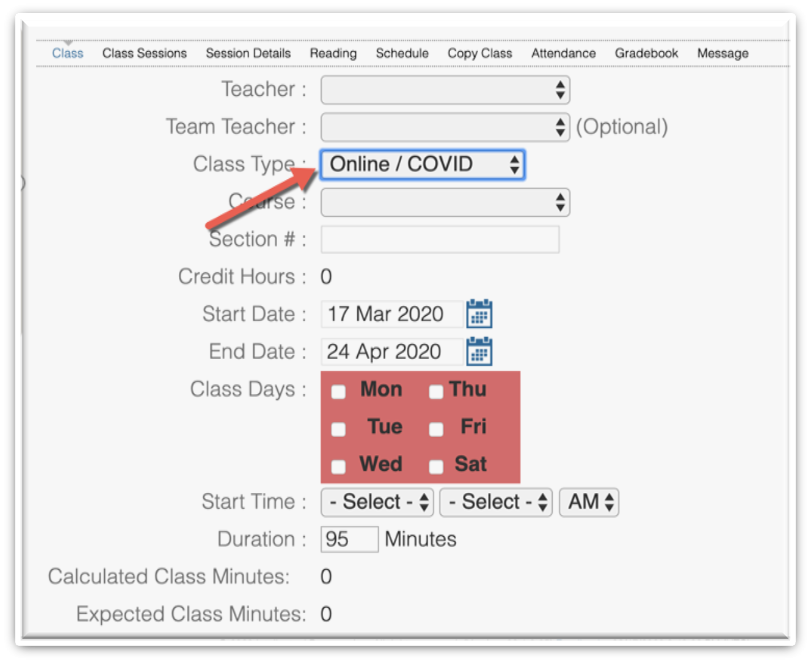
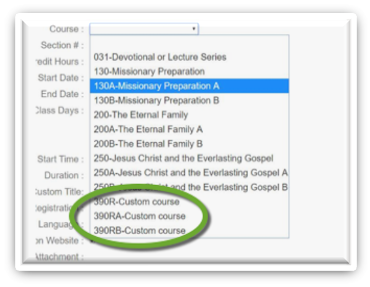
b) Next, pick the course that you will be setting up. All available options will be shown. If you are trying to set up a class that does not yet exist in Canvas, then select the custom course option (if you do this, the teacher will be responsible to add the appropriate content to Canvas). Fill out the rest of the fields as you would for another class. In the Teacher field, please select the teacher who will be teaching this course. (Please combine sections of the same course for each teacher.) Fill in the section number, days of the class, start time, and duration (although these are not used currently, they will be used in the future).
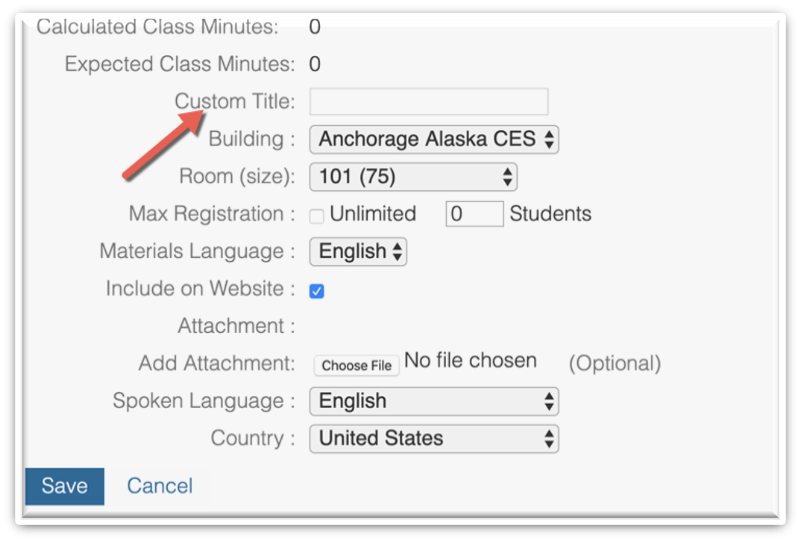
c) Fill in the custom title and the remaining fields. For max registration, please check “Unlimited.” Select the start and end date (enter the dates for your term), country, and materials and spoken language. Then click Save.
Note: It is imperative that you fill out the Custom Title field with something that will be easily recognizable for the teacher and the student. Consider entering in the course that will be taught.
This will then create the class in WISE and create the course in Canvas.
Step 4: Schedule Students into the Online Class
Remember, you will be combining classes wherever you can. This step will place the students from the already existing classes into the new Online/COVID class and add them to Canvas.
a) Click the Copy Class link for the online class.
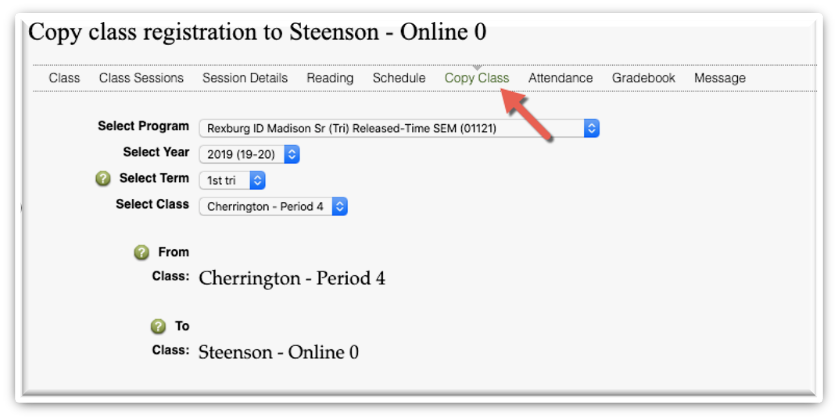
b) Select your current term.
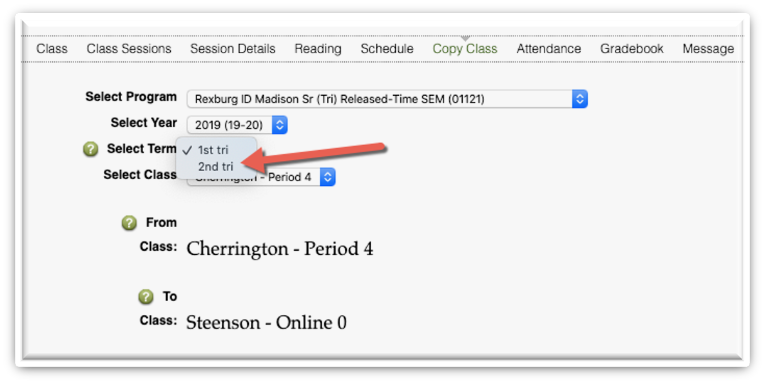
c) Select the course that you wish to copy into this Online/COVID class.
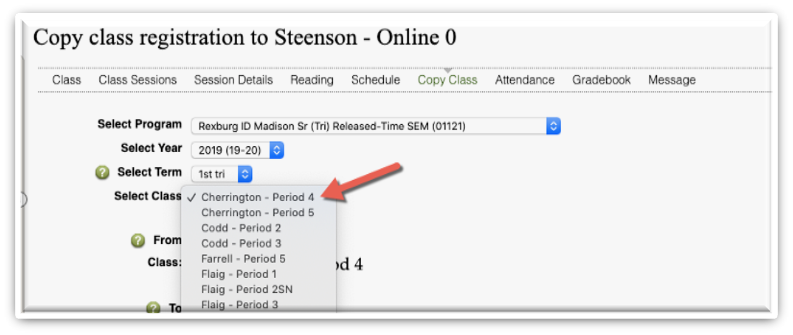
d) Click Copy in the upper right-hand side of the screen.

If you receive an error message, you may ignore it—the process is already running.
You will repeat step 4 until you have copied over the enrollments of all teachers into their online classes.
Step 5: (If Needed) Sync Your Scheduled Students with Canvas
If you need to add individual students to a class, then you will use this step. The previous steps will have already moved the majority of students over.
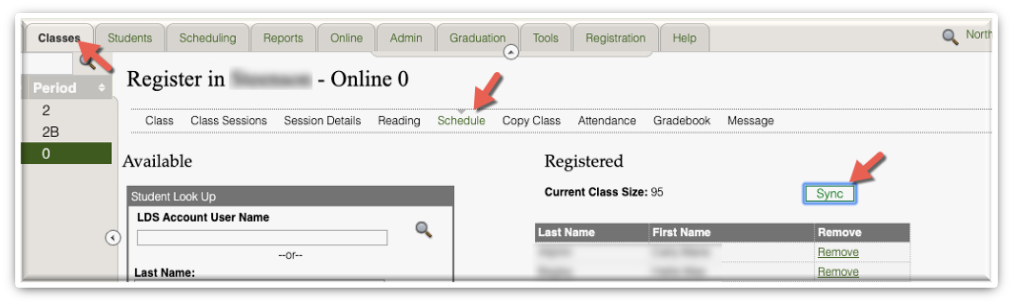
a) Click the Classes tab and select the new online class. Students should automatically be placed into the Canvas class. If needed, you can select Schedule and click Sync—this will place these students into Canvas.
Step 6: (If Needed) Schedule Missing Students
The previous step should enroll the majority of your students into the class in WISE as well as into Canvas. However, if they have recently joined your program or they did not have their email address and Church Account ID entered into myInstitute, then you will need to manually enter them into the class. (An easy way to identify these students is to have teachers compare their rolls for their current classes with the roll for this online class.)
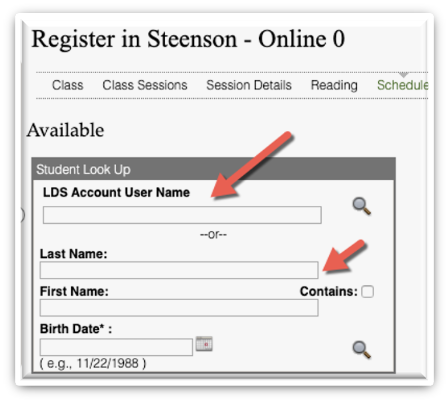
a) Click the Classes tab, select the online class, and then click Schedule.

b) You will now need to look up the students you need to add by either their Church Account ID (Church Account username) or their name and birth date.
c) When you have added the students, click Sync and then Save.
Nonmember students would be added the same way after they have created a Church Account. If they haven’t done this already, they will need to visit account.ChurchofJesusChrist.org and create a Church Account. However, you will need to manually enter their Church Account ID onto their student profile page in WISE (logging in to myInstitute will not work for these accounts).
Step 7: (If Needed) Enter Teachers
Teachers will need to have access to Canvas (a user account) and be enrolled in the Canvas class as an institute teacher in order to be able to work with their students.
a) The original teachers should be copied over from when you copied the classes. If, however, the teachers do not have the access they need, then click the Online tab and click Add Users. Select Program Employees in the search bar, and click the magnifying glass.
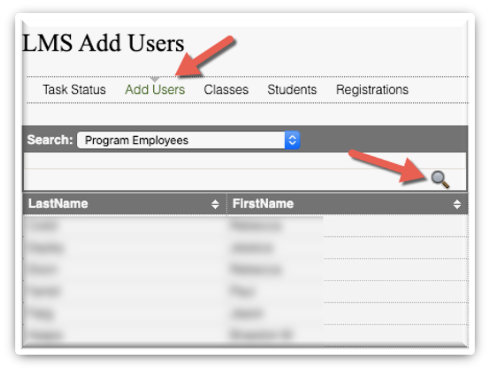
This will load the teachers that you have in your program.
b) Select the first teacher on the list, and click the plus button. Repeat this for each teacher in your program. This creates the Canvas user account for each teacher.
c) The second step in this process is to enroll any additional teachers as an “Institute Teacher” as needed in the Canvas class.
d) As the administrative assistant, log in to Canvas using your Church Account username and password (silearn.ChurchofJesusChrist.org).
e) From the dashboard, select the tile for the Canvas class that was created for your institute course.

f) Select People from the Navigation menu.

g) Select the +People button.

h) Add each teacher using his or her email address. Select Institute Teacher as his or her role, and then select Next.

i) If you see the green check indicating that it found the user account of the teacher you are wanting to add, select Add Users.

j) If you see the red warning sign, this indicates that it could not find the user account of the teacher you are wanting to add. Select Back and make sure you have the correct email address. Do not select Next on this warning page; it will not correctly add the teacher.

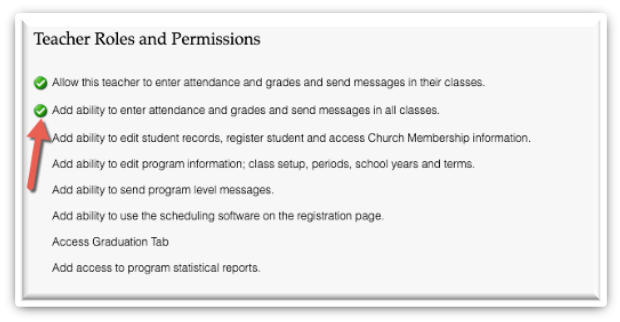
Step 8: Grant Permissions
Each teacher will need to see this class in WISE and have access to the course in Canvas.
a) Have your program administrator click the Programs tab, click Faculty, select a faculty profile, and then edit. They should ensure that the second checkbox is checked for each teacher.
Where Do I Go for Help?
If you need help working through this process or within Canvas, please reach out to our team at wise-feedback@ChurchofJesusChrist.org. Please include “NEW ONLINE” in the subject line.
For additional training on how to use Canvas, you may view multiple training videos and documents at silearn.ChurchofJesusChrist.org. You may also search this site for additional help.
Canvas website: silearn.ChurchofJesusChrist.org
WISE website: wise.ChurchofJesusChrist.org